
You do not need to know a machine model before contacting Xunding. Start with a photograph of the box folded into its finished shape, together with a photograph of the blank opened flat or its die-cut drawing. These two views let us identify the machine model for the box structure. Daily output and dimensions then make the recommendation more specific.
First, show the box as it will be used
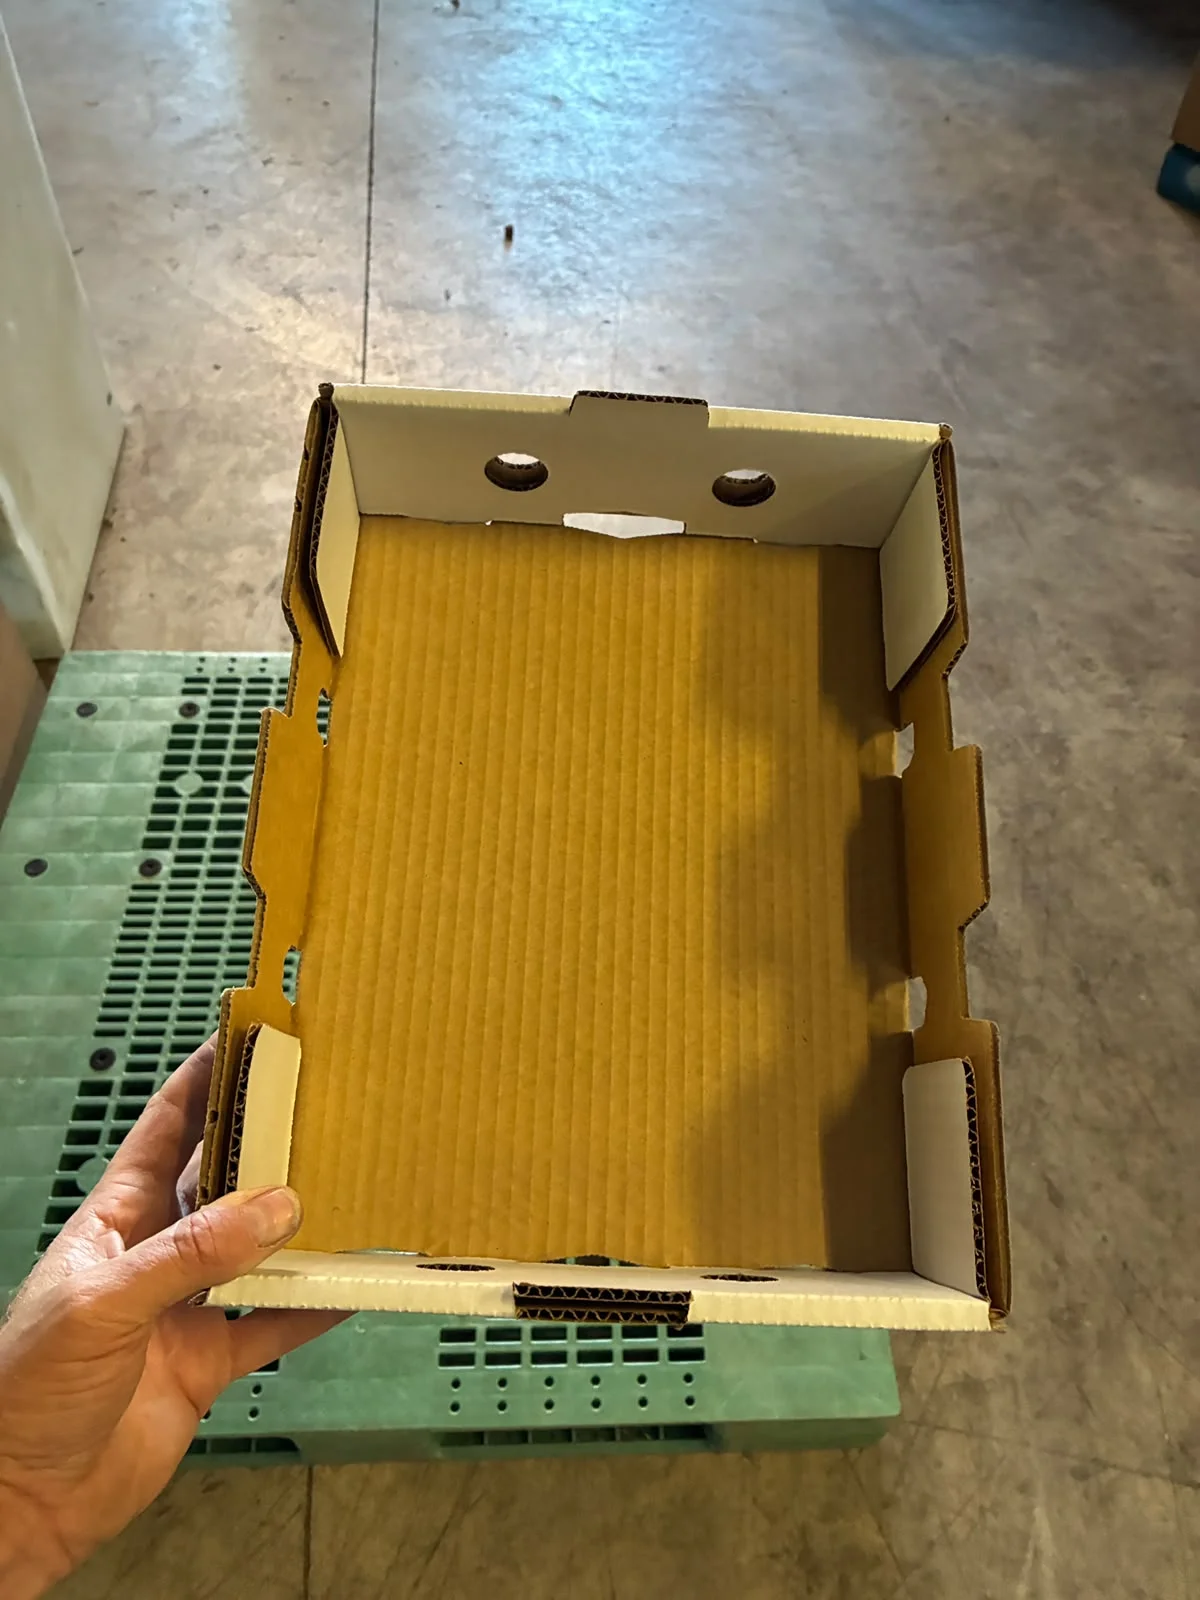
Take a clear photograph of the formed box. Include the corners, walls, lid if present, and the way panels meet. A top view is useful for an open tray; add a side or underside view when a joint, tab or folded panel is hidden.
The formed tray above shows why this view matters. It reveals the upright walls and folded corner panels. A picture of the printing alone would leave those features unclear. Photograph each structure you want to produce, even when several boxes have similar outside dimensions.
Second, show the opened blank or die-cut drawing
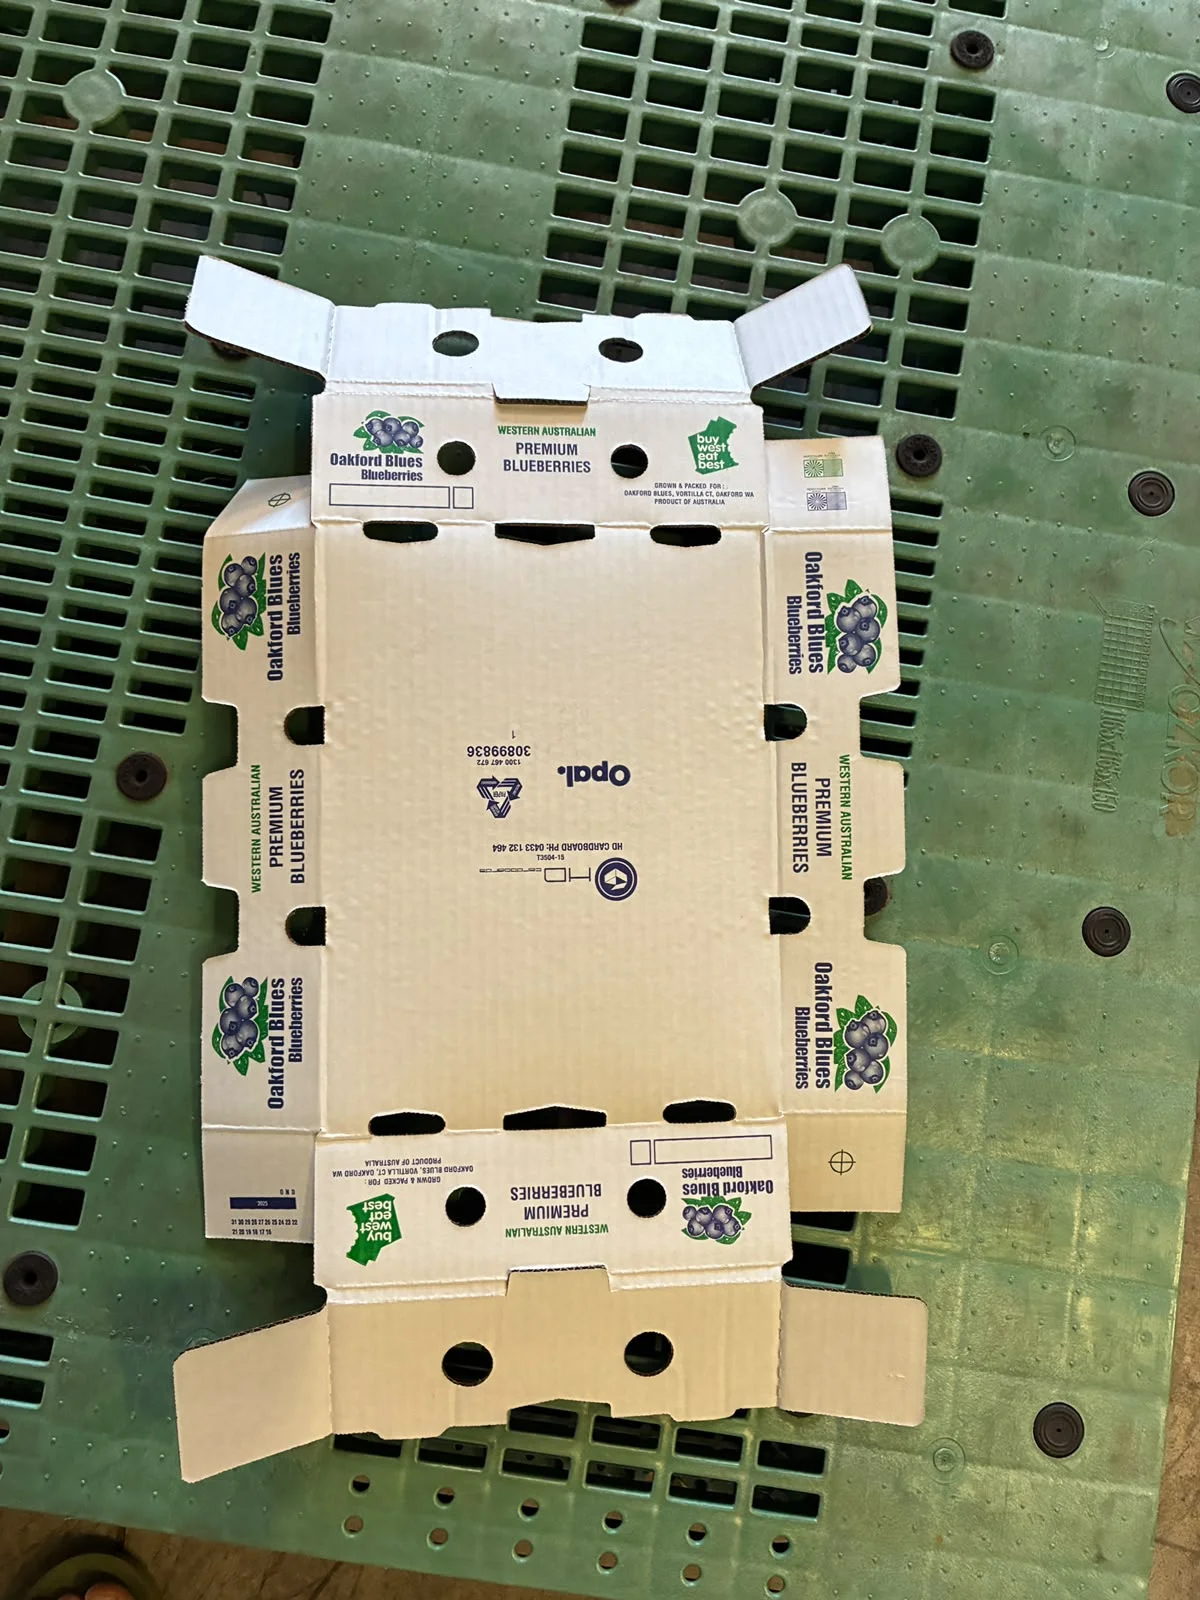
Lay the blank flat and keep its complete outline in the photograph. Show the crease lines, flaps, tabs, openings and panels. If the box uses separate pieces, photograph or draw every piece and show how they join in the finished box.
A die-cut drawing is an alternative to the flat photograph. Send the current drawing with its dimension labels and revision if available. A phone photograph is enough to start a model discussion when a drawing is not ready; a clearer view may be needed where folds or joints are difficult to see.
The opened example below makes the panel layout visible. Compare it with the formed view before sending: both should represent the same box design. Together they give Xunding the structural information needed to identify the machine model.
Then add finished dimensions and the blank size
Give the finished-box length, width and height in millimetres, and mark them on the photograph or drawing. Say whether these are internal or external dimensions. Keep the flat blank dimensions separate: its sheet length and width describe the material entering the machine, rather than the space inside the formed box.
For a lid-and-base design, include both parts. For a three-piece tray, include the base and both end pieces. If several sizes will run on one machine, list each size with its corresponding blank; the largest dimension alone does not describe the complete job.
Xunding model pages separate finished-box L/W/H from flat blank A/B where the catalogue provides both. Use the drawing on that model page to identify the dimensions. A published size range is a starting point for review, not proof that every box structure within it is compatible.
Explain how many boxes you need per day
Tell us the required boxes per day and the available working hours. Include the number of shifts, the mix of box sizes and how often you change designs. If the daily figure changes during a harvest season or a busy order period, give both the usual requirement and the peak requirement.
The same daily total can require different hourly output when working hours differ. Dividing daily required boxes by available production hours gives a planning average. Feeding, replenishment, changeovers and interruptions still need to be considered when confirming the proposed setup.
Ask for an output discussion based on your box and material. Catalogue speeds should not be treated as a guaranteed count of acceptable boxes across an entire shift.
Add material and site details for the configuration review
After the box structure has identified the model, board thickness, printing or coating, joint requirements and the actual sample help refine the configuration. Include those details if already known. Xunding may request production blanks or a physical sample to check a forming or gluing requirement.
For a connected production line, describe what happens before and after forming. Include the installation country, site power supply, available space and any conveying or stacking needs. These details affect the proposed equipment scope and arrangement.
Browse fruit tray forming models
A short brief you can send with the photographs
Send the two structural views first. Add the details below to move from identifying the model to reviewing a specific machine configuration. If a detail is still being developed, say so and send the information you already have.
| Information | What to send |
|---|---|
| Formed view | Clear photo of the folded box, including corners and any lid |
| Blank view | Complete flat photo or die-cut drawing; every part for a multi-piece box |
| Dimensions | Finished L/W/H in mm; internal or external; separate blank size |
| Production target | Boxes per day, working hours, shifts and peak requirement |
| Size changes | Each box design and the planned frequency of changeovers |
| Material and site | Known board/coating details, installation country and line requirements |
Send your box photos and production requirement to Xunding