


A machine trial and a pre-shipment inspection both come down to the same question: are the finished boxes good, measured against a standard you agreed in advance? This guide sets out what to check, how to sample, and what to record.
Check finished boxes against the approved sample
Every finished-box check needs a fixed reference point. That reference is the approved box drawing and sample you confirmed with the supplier before the machine was built and tooled. If that step was skipped, do it now: agree the drawing version and sign off a physical sample before any trial or inspection takes place.
During a trial, keep the approved sample at the machine. Compare erected boxes against it side by side, not from memory. "Looks fine" is not a check result; a comparison against the approved sample is.
Label and photograph the approved sample before the trial starts, and note the drawing version it corresponds to. Samples travel, fade, and get creased — a dated photo lets you prove what the baseline looked like on the day it was agreed, which is what you will refer back to if a dispute about box quality ever arises.
What to inspect: appearance, dimensions, function
Split the check into three groups so nothing is missed.
Appearance. Check print register, surface damage, glue marks outside the seam area, crushed corners, and crease quality. Look at boxes both flat and erected — some defects only appear once the carton is formed.
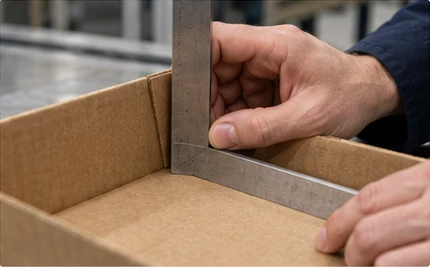
Dimensions. Check internal and external dimensions against the drawing, and check squareness across the corners. Use the same measuring method and the same points every time. Agree what deviation is acceptable before the trial, not after it: check the limits against the drawing and confirm them in writing with the supplier rather than improvising tolerances at the machine.
Function. Fold and unfold the flaps, check that the erected box holds its shape, and test the glue seam. Open a seam by hand on a sampled box: a seam that releases along the glue line rather than tearing the board points to an adhesive or application issue worth raising with the supplier.
Sampling and records during a machine trial
Do not judge a machine by its first boxes. Early output reflects warm-up and adjustment, so sample at fixed intervals across the whole run instead of watching the start.
For each sample, record the time and the box count, and photograph the box with a label in frame. Classify what you find: critical defects (box unusable), major defects (function or fit affected), and minor defects (appearance only). Agreeing these three classes with the supplier before the trial keeps the conversation factual afterwards — a critical defect demands a correction, while a scattering of minor defects may simply be part of running a new machine on new board. For shipment inspection, many buyers borrow the sampling logic of AQL-style plans such as ISO 2859 — the method is public standard knowledge, and the acceptance levels you apply are yours to agree with the supplier in writing.
Sampling boxes and counting output go together. If you record good boxes and rejects at each interval, you also have the data for machine output verification — two checks, one effort.
What to do when boxes fail checks
A failed check is a record, not an argument. Photograph the box, note the time and the count, and keep the physical sample — failed boxes are the reference for re-inspection.
Then classify the defect and agree the corrective step with the supplier: which change will be made, by whom, and when. After the adjustment, take a fresh sample before accepting the run. "We adjusted it" is not a result; a re-checked sample is. If the same defect class returns later in the run, your earlier records show the pattern — far more useful to a supplier engineer than a verbal description.
One habit keeps this loop honest: the same person, using the same method, checks every sample. Rotating inspectors mid-trial changes what gets flagged, because every checker weighs appearance and dimensions slightly differently. Consistency in the checker matters as much as consistency in the machine.
FAQ: flat cartons pass but assembled boxes fail — why?
Why can a carton look fine flat and then fail once it is assembled?
A carton can look acceptable flat, then show problems once erected: lost squareness, seams under stress, flaps sitting out of plane. The cause usually sits in the creases, the tooling, or the board — and only appears after forming. It happens often enough to plan for.
What should I do when failures only appear after assembly?
Check both states, every time. Inspect the flat blank for crease quality and print, then erect the box and inspect again. If failures appear only after assembly, share the photographs with the supplier and ask them to identify whether the cause is board, tooling, or machine settings — and to confirm the correction in writing.
Before your trial, turn this guide into a one-page checklist for each box style, attach your approved samples, and send both so the inspection points are agreed before the machine runs.